Today the new Cricut Cartridge, Artistry, was released and I couldn't wait to create a new card using one of the many designs from this cart. I paired it with Artfully Sent and created a cute pop-up card.
I designed the card in Design Space using the following images:
Artistry - #M4186FA Front Filigree
#M418416 Bow Label
Artfully Sent - #M105C05 Popup card insert happy birthday sentiment
Wrap it Up - You take the cake.
Here is how I laid it out on the mat in Design Space.
I like to select all my papers and put them in the order they will be cut on the Mat in Design Space. It makes the cut go faster for me.
I used a thin double sided K&Company paper for the intricate cut from the Artistry cartridge. I flipped the setting dial to Custom and chose Cardstock Intricate cut. Look how nicely it did the cut. I only had to weed 3 spots, so happy! I love my Explore!!
For the sentiments, I used DCWV Glitzy Glitter Cardstock which is a thinner glitter paper. I set the dial for Paper-Glitter Light to cut the words. I was nervous the cut would be a disaster but it cut like butter the first time! Look at how perfect those little flames cut! Did I mention I love my Explore?
Now all the piece are cut - it's assembly time!
For the card front, I inked the edges using CTMH Hollyhock ink (Z2128) shown here from the Mini Pad set, Adventure (Z2501)
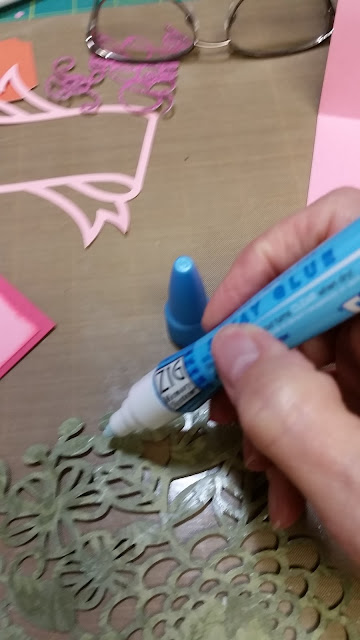
Here I'm gluing the back of the filigree with Zig 2-way glue and adding it to the pink layer.
To adhere the popup insert, I place adhesive to the bottom half of the insert first. Be careful to avoid adding glue to the popup piece. You want that to stay free so it moves when you open and close the card. I used my Xyron Mega Runner that has dotted adhesive. This allows me to run the glue over the open design without having it stick on the front.
Next, carefully place the pop up insert to the inside of the card lining up the folds. So far, only the bottom is glued down.
Next, add adhesive to the top and fold the card own over the pop-up.
To complete the pop-up, glue the sentiment to the background, add glue to the front of the cut out and adhere the sentiment to the insert. If will fold flat when the card is closed.
To complete the front of the card, I decided to emboss the bow using Cuttlebug Divine Swirls. I ran it through my Ebosser then glued on the light pink border.
I popped up the bow by adding 3d Dots to the back and adhered it to the front of the card.
I can't leave will enough alone so I added some Stickles to the card. I can't resist bling!
I hope you like my card. If you are interested in purchasing the new Artistry cartridge or any of the other CTMH cartridges, click here. Any size order will enter you in the August Mystery Hostess. One customer will receive the hostess credits good for free products for all the orders placed in August!


No comments:
Post a Comment
Comments Always Welcome!