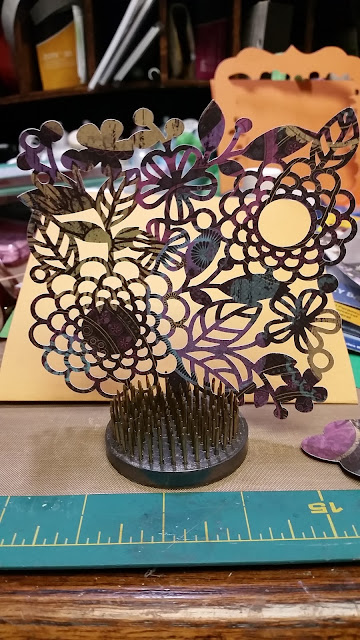
I'm loving working with the new CTMH Artistry Cartridge. So many images, so little time! Here is my Butterfly Kisses card.
Here are the images I chose for this card.
Artistry
#M4186FA Flowers
#M418634 Label
#M58A2E4 Butterfly
The paper is from Close to my Heart
Enchantment Cardstock Combo Pack in Goldrush (Included with the Artistry collection)
The printed paper is from a retired CTMH collection Laughing Lola.
Whatever paper you choose will look awesome!
The paper is from Close to my Heart
Enchantment Cardstock Combo Pack in Goldrush (Included with the Artistry collection)
The printed paper is from a retired CTMH collection Laughing Lola.
Whatever paper you choose will look awesome!
I love the image, Flowers, in Artistry but wanted it to be cut as part of the card front rather that just pasting it on.
To accomplish this for the card front, I started by adding a 2 squares to Design Space. I sized one smaller than the other and sliced the smaller from the larger. That gives me a large open square.
To accomplish this for the card front, I started by adding a 2 squares to Design Space. I sized one smaller than the other and sliced the smaller from the larger. That gives me a large open square.
Place the Flower image over the open square making sure that the sides of the image are overlapping the open square slightly.
Select both images and click 'Weld'
Bring in another square to the mat and size it to equal the welded image. Mine are sized to 5.5. Place it above the welded image overlapping slightly.
Select both images and click 'Weld.'
Attach a score line in the center to complete your card base.
Bring in the remaining images plus an additional Flower to use as an overlay on the card base.
I added the text 'Butterfly Kisses' using the Artistry font in Writing Style and attached it to the label. I used the Calligraphy Pen from the Cricut Variety Pen Set for the writing.
I added the text 'Butterfly Kisses' using the Artistry font in Writing Style and attached it to the label. I used the Calligraphy Pen from the Cricut Variety Pen Set for the writing.
I cut all my pieces on my Explore. I used the Intricate setting for the Flower and the Card base.
It cut perfectly on this setting with very little weeding needed and no tearing!
It cut perfectly on this setting with very little weeding needed and no tearing!
My original plan was to color the image using my ShinHan markers but decided to use a second Flower image cut from the Laughing Lola paper instead. I'll do the ShinHan coloring in a future project.
Using a spray adhesive, I adhered the Laughing Lola Flower over the card base. I put a glittery paper on the inside of the card to show through the front.
Using a spray adhesive, I adhered the Laughing Lola Flower over the card base. I put a glittery paper on the inside of the card to show through the front.
I used Martha Stewart glitter pens to color in the top of the butterfly.
Adhere the Embellishments to the card. I punched out two little butterflies using Martha Stewart Butterfly Punch.
I popped the large butterfly up using 2 layers of foam tape just underneath the body. Liquid Pearls in Buttercup was added to the flowers for a little extra punch.
Please leave a comment below. What are you working on now?


No comments:
Post a Comment
Comments Always Welcome!